 Pin it
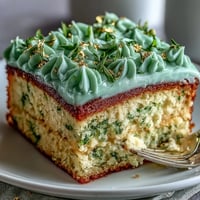
 There's something about baking a cake for someone's big moment that makes you want to get it right. My cousin's graduation was coming up, and I knew I didn't want to just buy something from a bakery—I wanted to create something that felt personal, that said more than words could. That's when I decided on a sheet cake with buttercream roses, the kind that looks like it came from a fancy pastry shop but feels homemade in the best way. The vanilla cake is soft and moist, the buttercream smooth and spreadable, and those piped roses? They're the cherry on top that makes people gasp a little when they see it.
I'll never forget frosting this cake at midnight the night before the party, piping roses while humming along to music, and suddenly realizing that this wasn't just dessert anymore. When my cousin's friends crowded around the table the next day and actually paused to take photos before cutting into it, I understood why people become bakers. That cake got passed around the room like it was something to be admired, and watching people's faces light up when they tasted how soft and buttery it was made all those careful decorating moments worth it.
Ingredients
- All-purpose flour (3 cups): Use the kind you already have in your pantry—nothing fancy needed, but make sure it's fresh because old flour can make the cake dense.
- Baking powder and baking soda (2½ tsp and ½ tsp): These are the lift-givers, and they need to be fresh enough to actually bubble, so don't use what's been sitting in the back for two years.
- Salt (½ tsp): A tiny pinch that makes the vanilla flavor pop and prevents the cake from tasting flat.
- Unsalted butter (1 cup for cake, 1½ cups for frosting): Room temperature is non-negotiable here—cold butter won't cream properly and you'll end up with a dense, heavy cake.
- Granulated sugar (2 cups): The sweetness that also helps create that tender crumb when creamed properly with butter.
- Eggs (4 large ones): Room temperature, just like the butter, because temperature matters more than you'd think when baking.
- Vanilla extract (1 tbsp for cake, 2 tsp for frosting): This is the flavor backbone, so use real vanilla if you can afford it—the difference shows.
- Whole milk (1¼ cups for cake, ¼ cup for frosting): Room temperature keeps everything at the same heat level, which helps your batter incorporate smoothly.
- Powdered sugar (6 cups, sifted): Sifting sounds tedious but it breaks up clumps and gives you smoother, silkier frosting that pipes beautifully.
- Gel food coloring (assorted colors): Gel is sturdier than liquid and won't thin out your frosting the way drops can.
Tired of Takeout? 🥡
Get 10 meals you can make faster than delivery arrives. Seriously.
One email. No spam. Unsubscribe anytime.
Instructions
- Set up your workspace:
- Preheat your oven to 350°F and grease that 12x18-inch pan like you mean it, then line it with parchment paper so your cake slides out without drama later. This is the moment to gather all your tools and ingredients because once you start mixing, you want to stay focused.
- Combine dry ingredients:
- Whisk flour, baking powder, baking soda, and salt together in a medium bowl, making sure everything is evenly distributed so you don't end up with pockets of baking soda that taste metallic. This step only takes a minute but makes a real difference.
- Cream butter and sugar:
- Beat the room-temperature butter and sugar together for 3-4 minutes until it looks pale and fluffy, almost like clouds. This is when you're incorporating air into the batter, which helps make the cake tender.
- Add eggs one at a time:
- Drop each egg in and beat well before adding the next one, then mix in the vanilla extract. If the mixture looks a little separated, don't panic—that's normal and will come together once you add the dry ingredients.
- Alternate wet and dry ingredients:
- Start with some of your flour mixture, then milk, then flour again, ending with flour, and mix just until you see no white streaks. Overmixing creates a tough cake, so stop as soon as things are combined.
- Bake until golden:
- Pour everything into your prepared pan, smooth the top, and bake for 30-35 minutes until a toothpick in the center comes out clean. Your kitchen will smell incredible during this time, I promise.
- Let it cool completely:
- This step requires patience but is worth it because frosting a warm cake is messy and the frosting will melt. Leave the cake in the pan on a wire rack until it's truly cool to the touch.
- Make the buttercream:
- Beat room-temperature butter until it's pale and creamy, then gradually add your sifted powdered sugar while mixing, followed by milk and vanilla. Beat for about 5 minutes until it's smooth, fluffy, and spreadable like the texture of clouds.
- Tint your frosting:
- Divide the buttercream into bowls and add gel food coloring a tiny bit at a time—you can always add more but you can't remove it. Save some white frosting for your base layer and for any areas between decorations.
- Create the base layer:
- Spread a thin, even layer of white buttercream over the cooled cake, which acts like a primer for your decorated roses and keeps everything looking polished. Use an offset spatula and take your time here because this base matters.
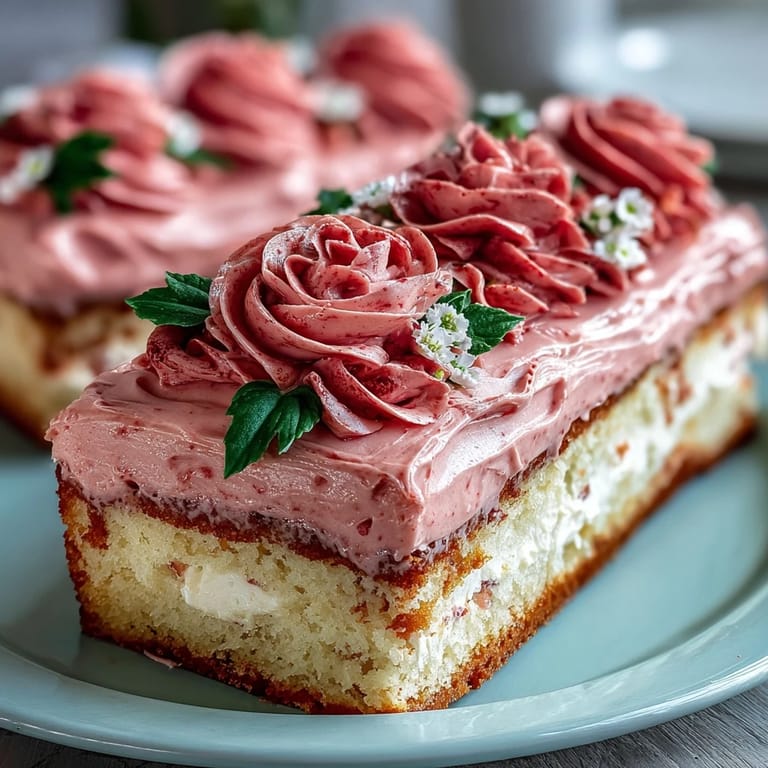
- Pipe your flowers:
- Fit your piping bags with petal tips for roses and leaf tips for leaves, then pipe roses focusing on corners or as a border. Start from the outside and work inward if that feels more natural to you.
- Add your message:
- Write your congratulations or personalized graduation message using a small round piping tip, and do it last so the words stay on top and crisp. Practice on a piece of parchment first if you're nervous about the lettering.
 Pin it
 There was a moment while piping the last rose when I stepped back and realized I'd created something beautiful and edible and exactly what this moment needed. That's when baking stops being just following a recipe and becomes something more—it becomes love expressed in layers and frosting.
Why This Works for Celebrations
A sheet cake feeds a whole crowd without requiring you to balance multiple layers or worry about structural integrity, which means you can focus your energy on making the decoration special instead of stressing about whether it'll stay upright. The scale of this cake makes it practical for parties, and the fact that it tastes genuinely good—not just pretty—means people will remember both how it looked and how it tasted. There's something about serving a cake that took real effort that changes the feeling of a celebration.
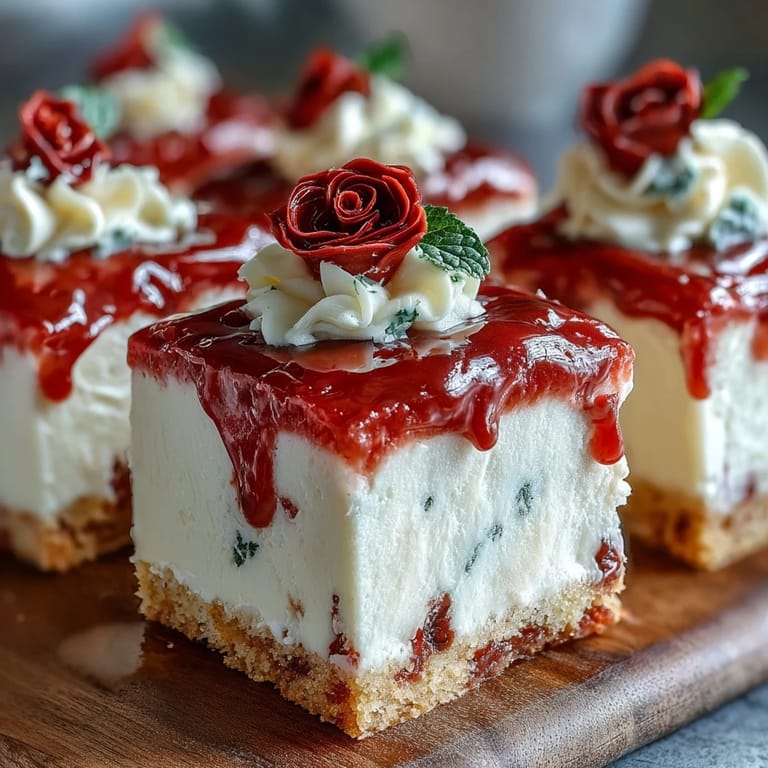
The Piping Part Isn't as Scary as It Sounds
I was genuinely nervous about piping roses the first time, convinced I'd create something that looked more like frosting blobs than flowers. But I learned that roses are actually very forgiving—you're essentially just layering small petal-shaped strokes around a center point, and imperfection reads as romantic, not messy. The best part is that even if one rose doesn't turn out, you can smooth it over and start again, or just embrace the rustic look.
Storage and Serving Suggestions
This cake actually tastes better when you eat it within a day or two of making it, when the crumb is still tender and the buttercream has that perfect spreadable texture. You can store it covered at room temperature for up to two days, or refrigerate it for up to five days, though cold frosting loses some of its smooth, luxurious quality so let it come to room temperature before serving if you refrigerated it. Pair it with sparkling lemonade for a refreshing contrast, or a glass of champagne if you're feeling celebratory.
- Keep the cake in a covered cake box or loosely draped plastic wrap so the frosting doesn't dry out.
- If you decorated it the night before, store it in a cool room rather than the fridge to preserve the buttercream texture.
- Let refrigerated cake sit on the counter for 20 minutes before serving so the frosting softens back to its silky best.
 Pin it
 Graduation cakes are more than dessert—they're a way to say I see you, I'm proud of you, and you matter to me. This cake does that beautifully.
Recipe FAQs
- → What baking pan size is best for this sheet cake?
A 12x18-inch sheet cake pan is recommended to ensure even baking and the right thickness for decoration.
- → How do I achieve smooth buttercream for piping?
Beat the buttercream until creamy and fluffy, ensuring powdered sugar is fully incorporated. This creates a smooth texture perfect for detailed piping work.
- → Can I use gel food coloring for the buttercream?
Yes, gel food coloring is preferred for vibrant colors that won't thin the buttercream consistency during piping.
- → How should I store leftover sheet cake?
Cover and keep at room temperature for up to 2 days, or refrigerate for up to 5 days to maintain freshness and texture.
- → Is there a way to make a chocolate variation?
Replace ¾ cup of flour with unsweetened cocoa powder to add rich chocolate flavor while maintaining the cake's moist texture.